Wednesday, June 22, 2011

Paparazzi found me...

Okay, I will write more about this later, when I've had sleep and am less distracted, but I must tell you all: I'm famous. You're surprised? Don't know why you should be....


In January myself and three amazing friends did a photo shoot for a mock-wedding (not to be confused with a mach-wedding -- faster than the speed of sound!!!!). Said wedding has been picked up and is now featured by an amazing and very well known party blog. See it here:


And some of my DIY techniques can be found:


Much thanks to my amazing friends and partners:
Event Styling and Floral Design: Jenni Bost of A Well Crafted Party
 Photography: Aubrie LeGault of Capturing Grace Photography
 Model: Joan Stevens

I can't wait to tell you more about this. Until then, just go check it out!!!

Tuesday, May 24, 2011

Blitskreig: German Potato Salad

I hate potato salad. I know, it's almost like saying I hate sunshine and summer, rainbows and unicorns, but honestly, until very recently I was certain that I hated any form of this starchy mush. Imagine potato salad. Seriously, right now close your eyes and envision the last potato salad you consumed: Mayonnaise, mustard, onion, and pickle, right? Varying layers of vinegar-tartness masked by fatty mayo; a soggy bit of Americana that should honestly die out along-side pork rinds and Frito pie. I'm not sure if I can quite call myself a patriot (this is a common issue for my generation), but certainly I feel fortunate and am proud to be a citizen of this country. Still, I have to admit that our comrades (and former enemies) across the Atlantic make possibly the only potato salad I find palatable. Bless the Germans; they really know how to cook a potato. This in itself is nothing short of a culinary miracle considering the origin of this tuber as one of the most shunned foods in human history. A bit of which I will share with you now:


Petrified potato remains dating back to 500 BC have been discovered in the ancient ruins of Peru and Chile. The Incas recognized that the long shelf-life of potatoes made them invaluable and would keep bins of them discreetly stashed away in case of war or famine.  

Potatoes didn't reach Europe until the late 1500's when conquistadors, who mistook the potatoes for (rather bland) truffles, brought them back to Spain from the Americas.The potato was introduced all across Europe by the early 1600's. Wherever the potato was introduced, it was considered weird, poisonous, and downright evil. In France and elsewhere, the potato was accused of causing not only leprosy, but also syphilis, narcosis, early death, sterility, and rampant sexuality, and of destroying the soil where it grew. And until about the 1850's, American farmers considered the potato more appropriate food for livestock than for their families. Now The Potato is one of the most commonly consumed foods, particularly in the U.S.


I love the potato's versatility. This Potato salad is not only delicious, but also easy to make, and I know you all love that. The super-short history lesson is over; get ready to cook.
You will need:
1 lb of red potatoes
1 fennel bulb
2 celery stalks
1/4 lb of thick cut bacon
1/4 cup of apple cider vinegar
3 tbsp stone ground mustard
1 tsp salt

Thoroughly wash your potato, fennel, and celery. Leaving the skins on, slice your potatoes to 1/2 inch thickness. mix your vinegar and mustard together in a small bowl and set aside. Gently boil the potato slices until they are slightly tender. Drain the water from the potatoes and transplant them into a big bowl then pour the vinegar and mustard mixture over them. Cut the fronds from the end of the fennel and save these for garnish. Dice your fennel to about 1/2 inch pieces and do the same to your celery and bacon. In a large skillet (large enough to eventually fit the potatoes and veggies) start cooking the bacon on a low-medium setting. You want to render the fat out, and the low temperature will help. When the bacon starts to brown, add your fennel and celery. When the fennel and celery sweat and become slightly translucent, pour the bacon/veggie mix over the potatoes and gently fold in. Salt to taste, garnish with the fennel fronds and serve warm!  


 http://www.sxc.hu/photo/366722 http://www.sxc.hu/photo/1255661
 http://www.sxc.hu/photo/559917
 http://www.sxc.hu/photo/793956

Saturday, March 26, 2011

May the S'mores Be With You

It's been a while since I've posted on here, and I apologize. I could make excuses: tell you about how I don't own a digital camera and have to borrow one whenever I want to download photos for the blog (true); how I've had the flu (also true); am planning a baby shower (for a friend) and laying groundwork for a cookbook (true); have had to work quite a lot lately (sometimes true, mostly not); but really, I have just not been super motivated. Winter is hard for me -- the lack of sun makes getting up in the morning hard enough some days; I really just want to drink coffee all day, hang out with my friends and watch Doctor Who. Spring is just around the corner, sun and flora following soon after, and I already feel more energized just thinking about it. In fact, I am posting this very recipe because it reminds me of last April and my friend Ryan's birthday. Ryan is a kid at heart and he decided to celebrate his birthday in true child-like fashion: silly games and s'mores.

To be completely honest, these are my favorite of all the cupcakes I've made. The base is classic graham cracker crust with velvet-smooth chocolate cheesecake filling and a scorched meringue top reminiscent of warm, toasted marshmallow. Too decadent, maybe. Rich, surely. Resist-able, certainly not.

First thing: Preheat your oven to 325(f). Line a cupcake pan with the cutest cupcake liners you can find. No need to grease anything. Place your cupcake pan on a sheet pan with a little water. Cheesecake is a custard and cooks much more evenly with a little steam in the oven.

CRUST:
2 cups graham cracker crumbs (just smash-em!)
6 tablespoons brown sugar
6 tablespoons (3/4 stick) unsalted butter, melted

Graham crust is amazingly easy and hard to resist eating on its own. Simply mix the brown sugar and graham cracker crumbs in a medium sized bowl and slowly pour over the butter and mix with your hand. You may not need all the butter and you may need a touch more, much depends on the humidity. You know it's cheesecake worthy when you can squeeze a small amount in you hand and it keeps its form.

FILLING:
9 ounces bittersweet bakers chocolate, chopped
2 8-ounce packages cream cheese, room temperature
1 cup sugar
1/8 teaspoon salt
3/4 cup heavy whipping cream
3 large eggs

Melt chocolate in a double boiler or bain marie, stirring frequently, until the chocolate is melted. Blend your cream cheese, sugar and salt in either a food processor, mixer with a paddle attachment or with a handheld mixer. Heck, you could do it all by hand if you want to work out your biceps. Now add your cream until fully incorporated, followed by your chocolate. Once this is all blended, you can begin SLOWLY adding your eggs. 

Fill your cupcake liners 3/4 full. Bake 20 min, then check for "doneness" with a toothpick. They will probably need a few more minutes. These will cook a little differently in every oven, so just be patient. Once the cupcakes are done, let them sit on the counter for 30 min, then cool in the refrigerator uncovered two hours before serving. 

MERINGUE TOPPING:

1 1/2 cup sugar
1/3 cup water
7 egg whites, at room temperature
1/2 teaspoon cream of tarter (optional -- the cream of tarter just helps stabilize the meringue)

In a small pot over low heat, combine the sugar and water. Swirl the pot over the burner to dissolve the sugar completely. Do not stir. Increase the heat and boil to soft ball stage (235 to 240 degrees). Wash down the inside wall of the pot with a wet pastry brush. This will help prevent sugar crystals from forming around the sides. In an electric mixer, whisk the egg whites on low speed until foamy. Add the cream of tartar, increase the speed to medium, and beat until soft peaks form. With the mixer running, pour the hot sugar syrup in a thin stream over fluffed egg whites. Beat until the egg whites are stiff and glossy.

Depending on the look you're going for, use a spoon or a pastry bag to apply the meringue to the tops of your cupcakes just before serving. Use a kitchen torch to make the meringue brown and toasty. You can use the broiler in your oven if you don't have a torch, but it just won't do as well. I highly recommend the small investment.
I hope you enjoy these tasty treats. Happy Spring, everyone!


Wednesday, February 2, 2011

Think you have what it takes?

It makes me uncomfortable when people call me "Chef." My skin outright crawls. The Chef is the head of the kitchen, the lynch pin holding the entire crew together -- it takes people decades to earn that position and I maybe never will. Rather, I hope I never will. I have never been the boss of anyone; sometimes I pretend I'm the boss of my cat, but he won't even fall for that. I'm best at being boss of myself, and that's all I could ever hope for.

I'm writing this post for anyone who is considering going to culinary school. The average cost for a culinary degree is around $40,000. For $60,000 you could get a business degree and get a job making $70,000 a year. Most cooks make under $30,000. Hell, most have to work a second job just to pay rent. I don't regret getting my culinary degree -- not entirely anyway. I do regret the debt I'm in now. I also regret not weighing in my options. I went to culinary school on a whim, thinking that as an artist I could apply my skills to cake decorating and make those $4,000 cakes you see at the weddings of people who just don't know any better. But unless you own your business, you just wind up getting paid $10 an hour to make those cakes for someone else to profit from. I'm not even a cook anymore; I'm a server. I can't name the restaurant I work at, let's just say when you eat there you're "family." This blog is the meager beginning of what I hope will be my own business. In my future I see sponsors for my blog, cookbooks, and eventually a very nice, quiet bake shop to call my own. It all will take a lot of work and a very long time. That's something they didn't tell us in culinary school -- and they won't tell you either. In fact, they may even promise you a job when you graduate. Trust me, it's not true. You have to make your own way, which is why I am giving you this small bit of advice: if you have any other passion -- the vision of any other path in your line of view, take that and run with it. Don't wind up $40,000 in debt wondering if you would been a great librarian or veterinarian. Be certain. And if you are, then good luck to you. I look forward to eating at your restaurant.

Tuesday, January 18, 2011

Achiote chicken tacos


 I love Mexican food more than any other food on the planet. If I had to choose one food to eat for the rest of my life it would not be a burger, pasta, lobster or steak; it's all about the taco. And this taco is all about the sweet and savory meat.

You need:
2 lbs chicken thigh
flour for dredging
2tsp canola oil
@ cups Orange juice
2 tsp achiote paste
4 Jamaican peppers, rehydrated and seeded
salt to taste

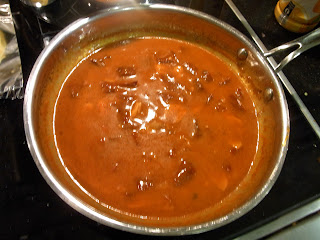
I like to use chicken thighs when cooking -- there tends to be more flavor and the meat is just more tender. Dark meat also has a higher fat content, so you will want to trim off as much of the fat as you can. Dredge the thighs in seasoned flour and brown them on medium heat with a little oil. In a bowl mix your Achiote paste and orange juice. Pour the mixture over the cooked chicken -- bring to a boil, reduce to a simmer and cover until the meat falls apart with a fork. Uncover and reduce the sauce until very thick.


1 can Black beans
1can roasted tomato
handful of cilantro chopped
Chili Powder, salt and Cumin to taste


I use canned black beans. Dry beans are more inexpensive, but I don't usually have time to soak them. Simmer your beans in a pan with tomato, cilantro, chili powder and cumin. Salt to taste.
Check out the spread:
Top your excellent taco creation with avocado and some queso fresca and enjoy!

Friday, January 14, 2011

Sliding sideways. The perfect cupcake.


 I returned this week from one of the most enjoyable beach vacations I have ever taken. There are few entities more powerful and awe-inspiring than the Pacific Ocean on a stormy January morning -- or the friends you are fortunate enough to enjoy it with.  It was a weekend free from cellular phones, television, and distractions from our Monday-through-Friday grind lifestyles. Simply put, it was bliss. It was also a weekend of celebration, albeit a quiet reverie, of the 30th birthday of one of the most youthful and hip chicks I know. And since no birthday is complete without cake, I made these delightful little cupcake treats: amaretto cupcakes with Baily's butter cream and edible gold adorned toasted almond slices. The sparkles add an alien, daring deliciousness to the cupcake. They really do. Or maybe it was the Cafe Negro Porter I was drinking -- Caffeine + alcohol -- sliding sideways through the weekend.  


For 12 cupcakes you will need:
1 cup white sugar
1/2 cup unsalted butter cool, but not cold
2 eggs
1/2 tsp vanilla
2tsp almond extract
1 1/2 cups cake flour
1 tbsp baking powder
3/4 cup milk

Preheat your oven to 350 F. Cream your butter and sugar in a medium sized mixing bowl until light yellow. Slowly add your eggs, almond, and vanilla and mix until fluffy. Add your flour and baking powder until fully incorporated then mix in your milk. This recipe is really hard to screw up. Just make sure your batter is smooth. Fill your cupcake papers about half way and bake about 10-15 min or until a toothpick inserted in the center of the cake comes out clean.

There are quite a few different versions of butter cream. My favorite is Italian butter cream because it's by far the smoothest, it doesn't feel too much like you have a mouthful of butter, and it can be kept at room temperature. No salmonella! Any day I don't have food poisoning is a good day.

I used a recipe posted by Louise Dueholm on her awesome website: CakeJournal. Honestly, this recipe beats the one I learned in culinary school 10-1 and her step-by-step instructions should make it easy for you even if if this is your first attempt at making Italian meringue Butter cream. I flavored mine with just an ounce of irish cream. A little goes a long way.

My recommendation for you this weekend, even if you can't make it to the beach, is to make a dozen of these pretty little cakes, open a bottle of Cafe Negro Porter and slide sideways until the Monday monster comes to bring back the work-week grind.